

Before you start
You need:
- An Auth0 development tenant configured with Universal Login and custom domain.
- Enable Identifier First Authentication on your tenant to render the ACUL Login ID screen.
- A development application or an Auth0 SDK sample application on
localhostfor Auth0 authentication. - A database connection to authenticate users.
- An Auth0 ACUL sample application to render the ACUL screens.
Setup
In your , set up Universal Login, Identifier First Authentication, and a Database Connection that uses passwords. Run a single-page application to build custom login screens. To understand the context for Advanced Customizations interfaces, clone our boilerplate app:git clone https://github.com/auth0/auth0-acul-react-boilerplate
Install the ACUL SDK. After cloning the react boilerplate, change the directory to the auth0-acul-react-boilerplate folder and install the SDK.
shadcn init command to set up your project. After answering a few questions to configure components.json, begin adding components to your project. Your completed Build Identifier First Signup with Password flow will use button, label, input, text, link, CardHeader, CardTitle, CardDescription, and CardContent components.
Step 1. Build the signup-id screen
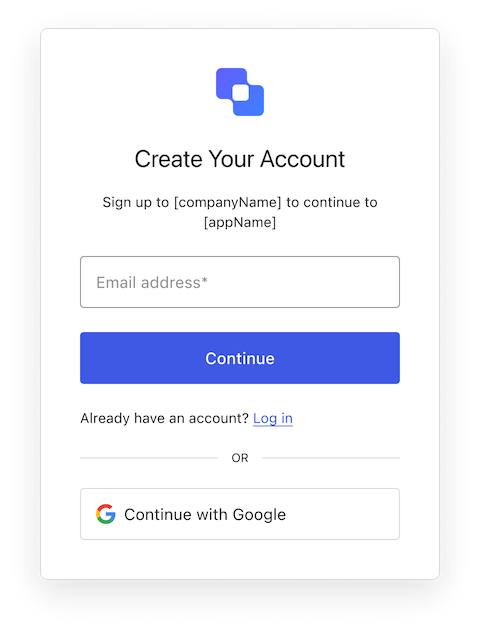
Signup ID
Signup ID
Import and initialize the SDK
In theauth0-acul-react-boilerplate/src folder, create a folder called screens and a file called Login.tsx. Import the SDK and in the React component initialize the SDK for the screen.
Use the SDK to access properties and methods on the screen
Using the SDK you can access the properties and methods of the screen. The Auth0 ACUL JS SDK provides properties and methods to access the data. For more information about context data, read Universal Login Context Data.Implement the signup action
Locate thebutton click function in the Login.tsx file to implement the signup action.
Call the submit action
Using the SDK, submit the data captured in the screen to the server. The server process this data and will route the user to the next step in the flow. If there are errors, this screen is reloaded, allowing you to display them to the user. Errors are accessed from the SDK.Step 2: Build the signup-password screen
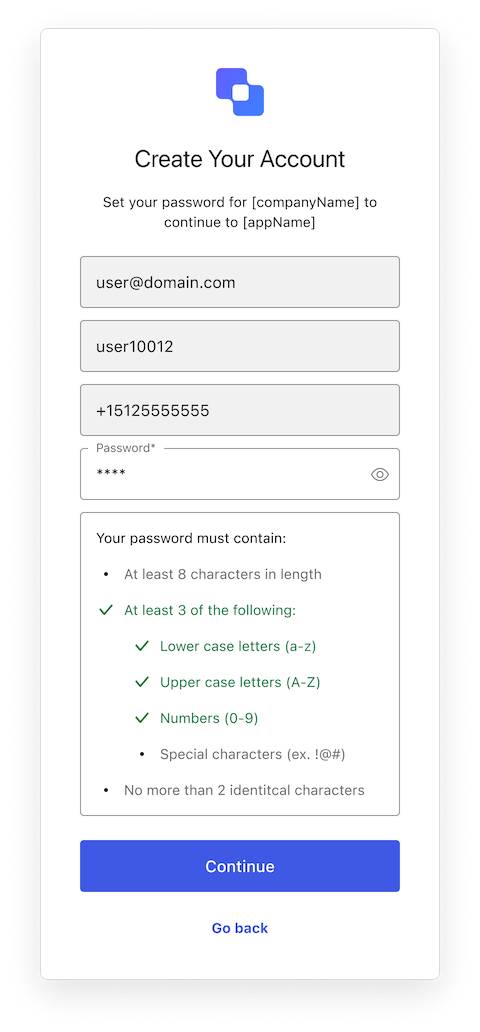
Signup Password
Signup Password
Import and initialize the SDK
In theauth0-acul-react-boilerplate/src folder, create a folder called screens and a file called Login.tsx. Import the SDK , then use the the React component to initialize the SDK for the screen.
Use the SDK to access properties and methods on the screen
Using the SDK you can access the properties and methods of the screen. The Auth0 ACUL JS SDK provides properties and methods to access the data. For more information about context data, read Universal Login Context Data.Call the submit action
Using the SDK, submit the data captured in the screen to the server. The server process this data and will route the user to the next step in the flow. If there are errors, this screen is reloaded, allowing you to display them to the user. Errors are accessed from the SDK.Step 3: Configure ACUL to use local assets
Use Auth0 CLI, Terraform, or the to enable ACUL. For details about what can be configured, read Configure ACUL Screens.- Auth0 CLI (Recommended)
- Auth0 Terraform
- Auth0 Management API
In the root directory of your project, create a Enable ACUL with Auth0 CLI:
settings folder and include in it a {SCREENNAME}.json file.Test your configuration on a local server
ACUL requires assets to be hosted on a public URL. Run a local server and test your assets before deploying them.Step 4: Deploy the assets and update your tenant configuration
Advanced Customization for works with all modern Javascript bundlers. like Vite and Webpack. For more information, read Deploy and Host Advanced Customizations. For more information about deploying ACUL to your tenant, read Configure ACUL Screens.Related content
| Read… | To learn… |
|---|---|
| Advanced Customizations for Universal Login | How Advanced Customizations work. |
| Getting Started with Advanced Customizations | Getting Started basics for Advanced Customizations |
| Advanced Customizations for Universal Login: Screens | A list of all screens available for Advanced Customizations. |