> ## Documentation Index
> Fetch the complete documentation index at: https://docs-staging-quickstart-revamp.mintlify.site/llms.txt
> Use this file to discover all available pages before exploring further.
> Walkthrough for Azure Connection Setup via SAML SCIM
# Inbound SCIM for Azure AD SAML Connections
Your Auth0 plan or custom agreement must include Enterprise Connections to use this feature. To learn more, read [Auth0's Pricing Page](https://auth0.com/pricing).
[Postman](https://www.postman.com/downloads/) must be installed on a local machine to test your Inbound SCIM connections.
This section describes how to configure a non-gallery enterprise application in Microsoft Azure Active Directory (now known as Microsoft Entra ID), which can be used to provision users to your Auth0 SCIM endpoint.
### Configure SCIM settings in Auth0
1. Launch the [Auth0 Dashboard](https://manage.auth0.com/#/), go to **Authentication > Enterprise > SAML > \[your-connection] > Settings.**
2. Browse to **Authentication > Enterprise > SAML > \[your-connection] > Provisioning** and disable **Sync user profile attributes at each login** unless you want to [sync additional attributes at login](/docs/authenticate/protocols/scim/configure-inbound-scim).
3. In the same section, enable **Sync user profiles using SCIM**.
4. Under the **Mapping** tab, ensure the **SCIM attribute containing the User ID** setting is set to **userName**.
5. Move to the **Additional Mappings** area and replace this:
```json lines
{
"scim": "emails[primary eq true].value",
"auth0": "email"
},
```
With this:
```json lines
{
"scim": "emails[type eq \"work\"].value",
"auth0": "email"
},
```
6. Review other **Additional Mappings** to ensure the extended SCIM attributes are mapped to your preferred Auth0 attributes. See [attribute mapping](/docs/authenticate/protocols/scim/configure-inbound-scim#attribute-mapping) for details.
7. Choose **Save Changes**.
### Retrieve SCIM endpoint URL and token
Configuring SCIM in an Azure AD tenant requires a SCIM endpoint URL and token from Auth0. These values can be retrieved manually via the Auth0 dashboard, or programmatically via the Management API. See the [Deployment Guidelines](/docs/authenticate/protocols/scim/configure-inbound-scim#deployment-guidelines) section for best practices. Using the dashboard:
1. In the Auth0 dashboard, browse to the SCIM **Setup** tab, then copy the **SCIM Endpoint URL** and paste it somewhere safe.
2. Generate SCIM token by choosing **Generate New Token,** then set an expiration date for the token if you wish.
3. Select the scopes you want to grant to Azure AD. The default requires scopes used by Azure AD are `get:users`, `post:users`, `patch:users`, and `delete:users`.
### Configure SCIM in Azure AD for SAML Apps
1. If the SAML application is not already registered, register a custom **non-gallery enterprise application** in an Azure AD tenant by [following the instructions here](https://community.auth0.com/t/setting-up-azure-ad-as-saml-enterprise-connection/87829).
2. Go to the **Manage > Properties** tab and confirm that **Assignment Required** is set to **Yes**.
3. Go to the **Manage > Users and Groups** tab and assign the Azure AD users you want to provision. When you assign a group, the users from that group are provisioned.
4. Select the **Manage > Provisioning** tab, select **Get started**, and choose **Automatic** as the **Provisioning Mode.**
5. Choose **Admin Credentials**, then enter the **SCIM Endpoint URL** value you saved earlier as the **Tenant URL**. At the end of the URL, add `?aadOptscim062020` query parameter to fix [known issues described here.](https://learn.microsoft.com/en-us/azure/active-directory/app-provisioning/application-provisioning-config-problem-scim-compatibility)
6. Paste the token value into the **Secret Token** field and select **Save.**
7. Head to **Mappings** and select **Provision Azure Active Directory Users,** then go to **Attribute Mappings** and select the line containing `emails[type eq "work"].value` and `mail`
8. In the **Edit Attribute** screen, change **Match objects using this attribute** to **Yes,** thenset **Matching precedence** to **2** and choose **OK.**
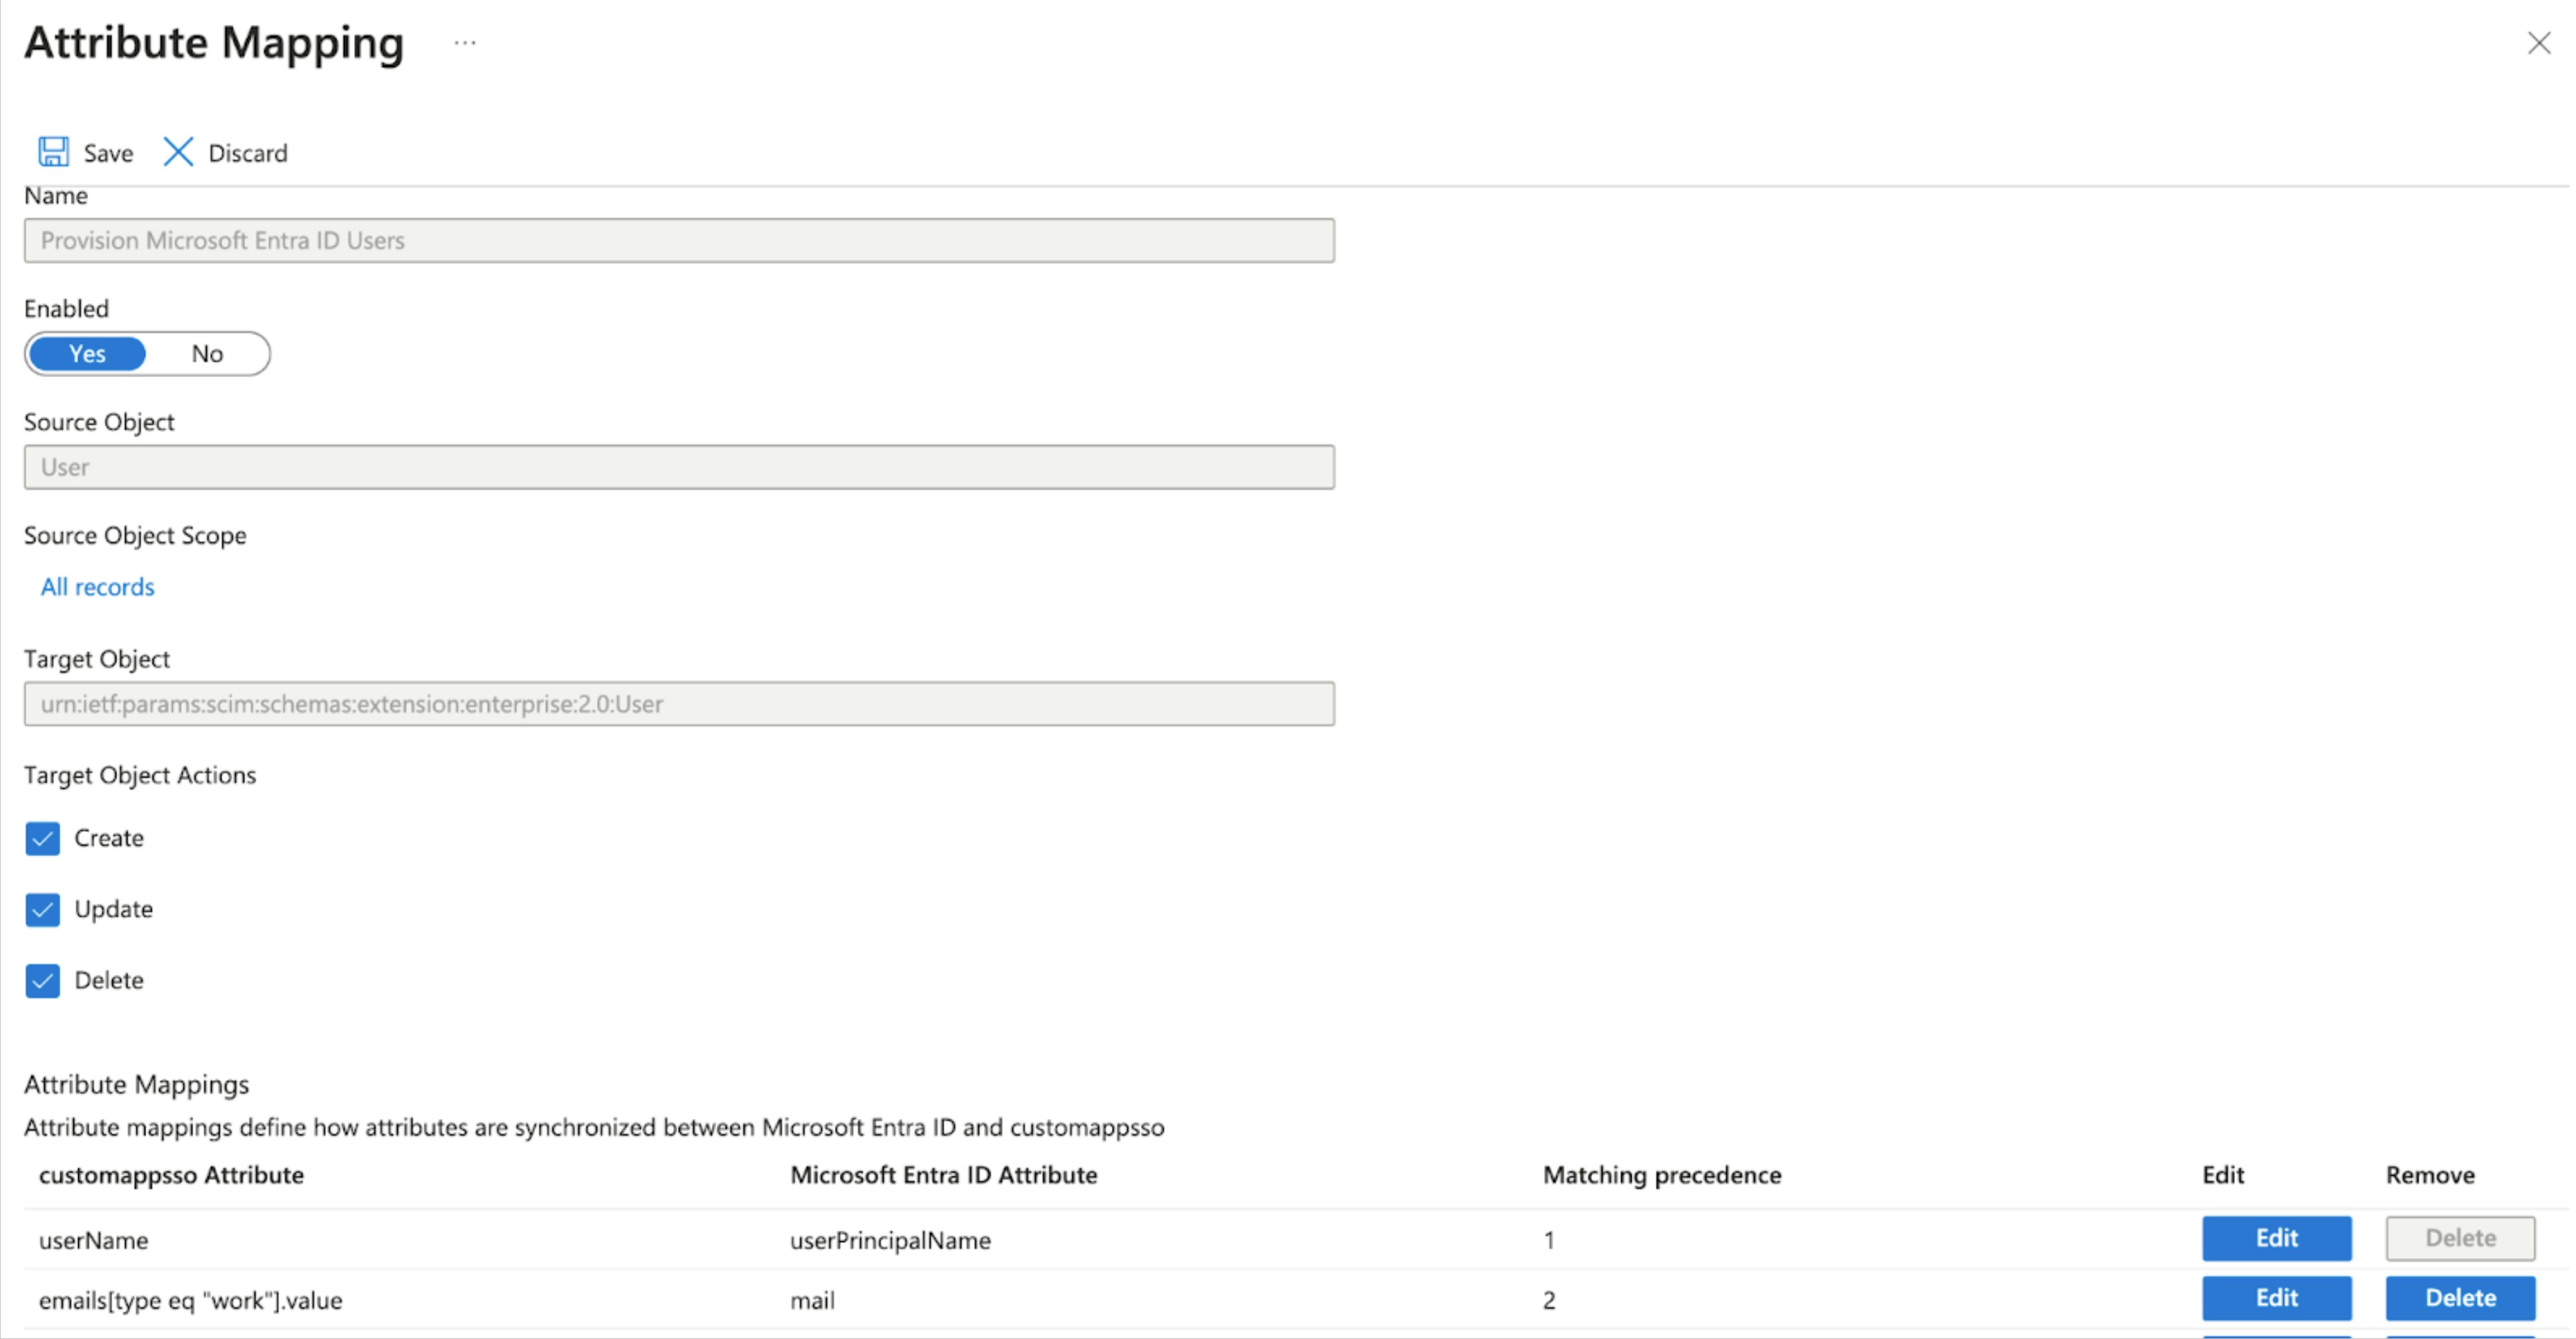 Choose **Save** to save the attribute mappings, then select **X** in the upper-right corner to return to the **Provisioning** screen.
#### Testing
1. On the Enterprise application overview screen, select **Manage > Provisioning** then **Provision on Demand** to test the SCIM connection.
2. Go to **Select a user or group** and type the name of a user that you assigned to the application, then select the user and choose **Provision**. This creates the user in the Auth0 tenant.
3. Provision all assigned users by [following the instructions here](https://learn.microsoft.com/en-us/entra/identity/app-provisioning/configure-automatic-user-provisioning-portal#provisioning-status) to set the **Provisioning Status** to **On**.
Choose **Save** to save the attribute mappings, then select **X** in the upper-right corner to return to the **Provisioning** screen.
#### Testing
1. On the Enterprise application overview screen, select **Manage > Provisioning** then **Provision on Demand** to test the SCIM connection.
2. Go to **Select a user or group** and type the name of a user that you assigned to the application, then select the user and choose **Provision**. This creates the user in the Auth0 tenant.
3. Provision all assigned users by [following the instructions here](https://learn.microsoft.com/en-us/entra/identity/app-provisioning/configure-automatic-user-provisioning-portal#provisioning-status) to set the **Provisioning Status** to **On**.