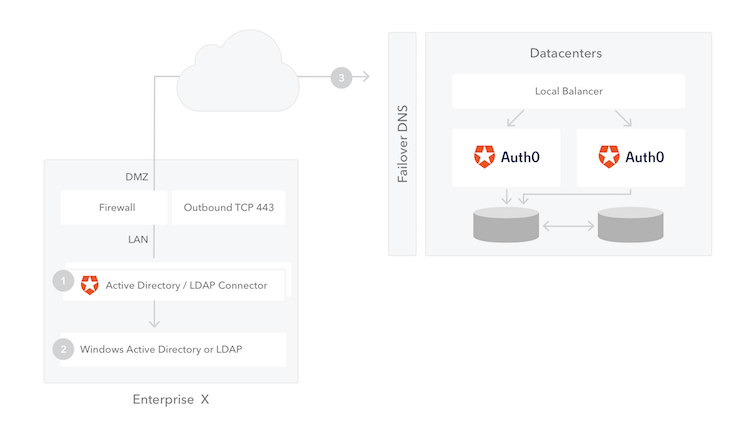
 For [high availability and load balancing](/docs/authenticate/identity-providers/enterprise-identity-providers/active-directory-ldap/ad-ldap-connector/ad-ldap-high-availability), you can install multiple instances of the connector. All connections are outbound from the connector to the Auth0 Server, so changes to your firewall are generally unnecessary.
## Prerequisites
Before beginning:
* [Register your Application with Auth0](/docs/get-started/auth0-overview/create-applications).
* Select an appropriate **Application Type**.
* Add an **Allowed Callback URL** of `{https://yourApp/callback}`.
* Make sure your Application's [**Grant Types**](/docs/get-started/applications/update-grant-types) include the appropriate flows.
## Steps
To connect your application to Active Directory/LDAP, you must:
1. [Create an enterprise connection in Auth0](#create-an-enterprise-connection-in-auth0) and download the installer
2. [Install the connector on your network](#install-the-connector-on-your-network)
3. [Enable the enterprise connection for your Auth0 Application](#enable-the-enterprise-connection-for-your-auth0-application)
4. [Test the connection](#test-the-connection)
## Create an enterprise connection in Auth0
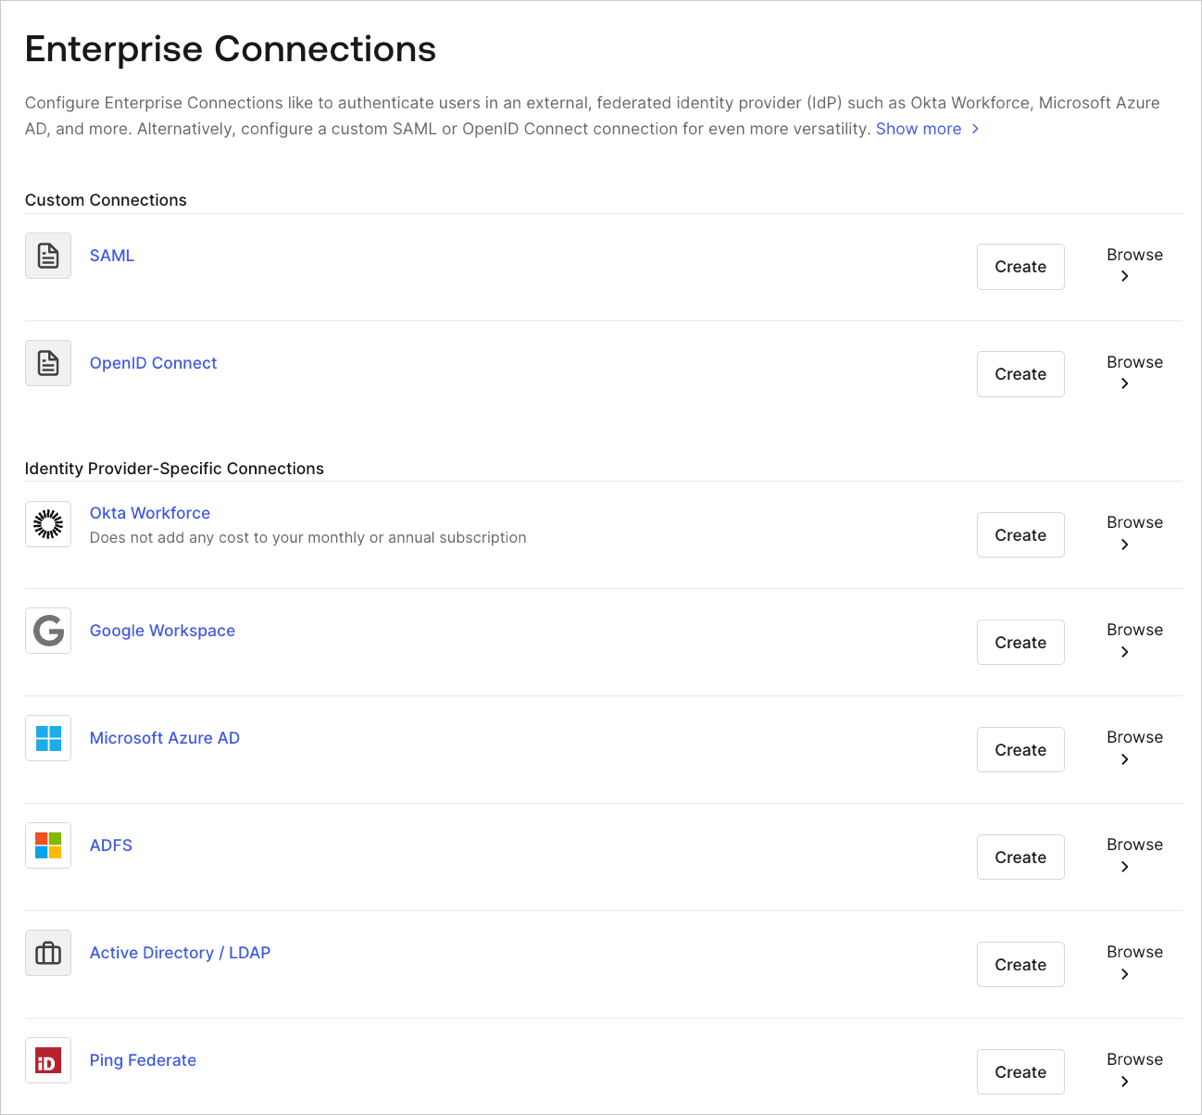
1. Navigate to [Auth0 Dashboard > Authentication > Enterprise](https://manage.auth0.com/#/connections/enterprise), locate **Active Directory / LDAP**, and select its `+`.
For [high availability and load balancing](/docs/authenticate/identity-providers/enterprise-identity-providers/active-directory-ldap/ad-ldap-connector/ad-ldap-high-availability), you can install multiple instances of the connector. All connections are outbound from the connector to the Auth0 Server, so changes to your firewall are generally unnecessary.
## Prerequisites
Before beginning:
* [Register your Application with Auth0](/docs/get-started/auth0-overview/create-applications).
* Select an appropriate **Application Type**.
* Add an **Allowed Callback URL** of `{https://yourApp/callback}`.
* Make sure your Application's [**Grant Types**](/docs/get-started/applications/update-grant-types) include the appropriate flows.
## Steps
To connect your application to Active Directory/LDAP, you must:
1. [Create an enterprise connection in Auth0](#create-an-enterprise-connection-in-auth0) and download the installer
2. [Install the connector on your network](#install-the-connector-on-your-network)
3. [Enable the enterprise connection for your Auth0 Application](#enable-the-enterprise-connection-for-your-auth0-application)
4. [Test the connection](#test-the-connection)
## Create an enterprise connection in Auth0
1. Navigate to [Auth0 Dashboard > Authentication > Enterprise](https://manage.auth0.com/#/connections/enterprise), locate **Active Directory / LDAP**, and select its `+`.
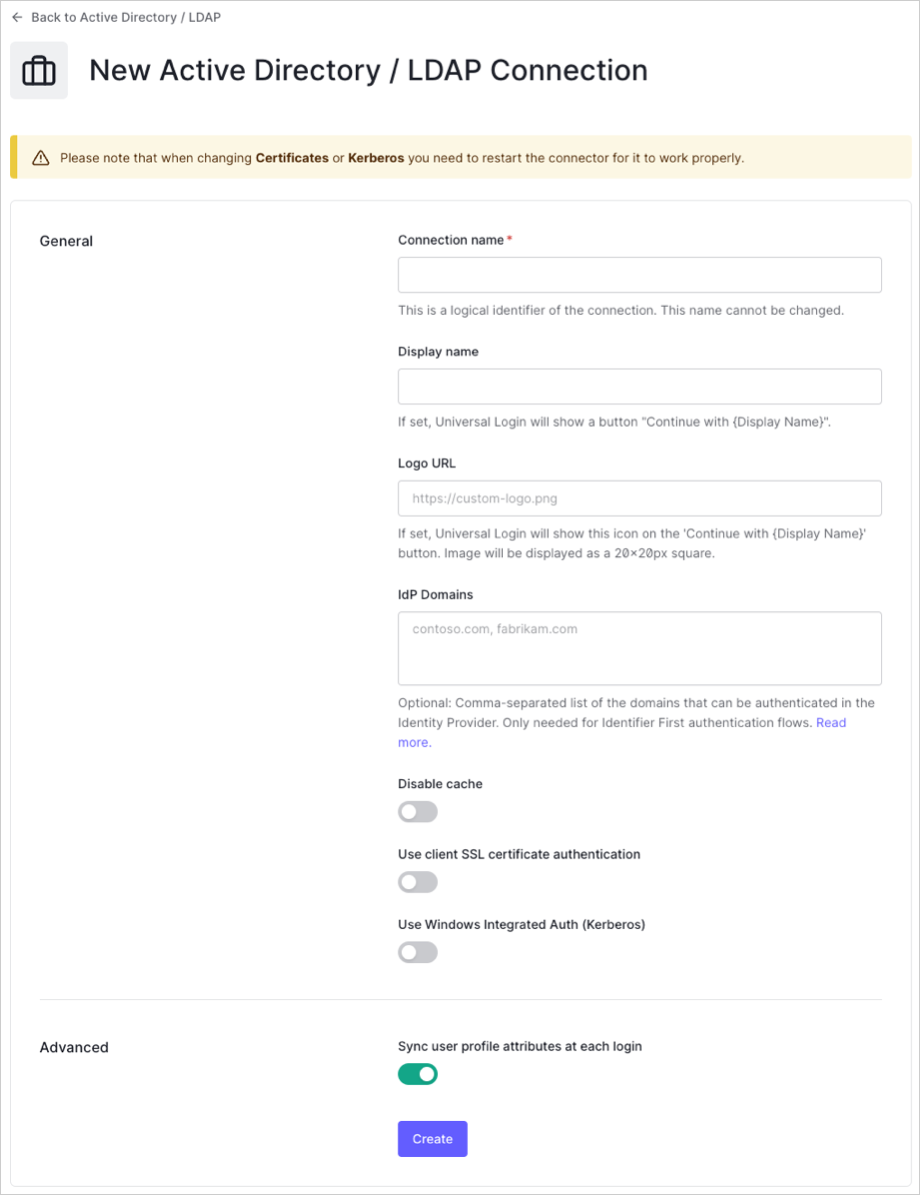
 2. Enter details for your connection, and select **Create**:
| Field | Description |
|---|---|
| Connection name | Logical identifier for your connection; it must be unique for your tenant. Once set, this name can't be changed. |
| Display name (optional) | Text used to customize the login button for Universal Login. When set, the Universal Login login button reads: "Continue with \{Display name}". |
| Logo URL (optional) | URL of image used to customize the login button for Universal Login. When set, the Universal Login login button displays the image as a 20px by 20px square. |
| IdP Domains (optional) | Comma-separated list of valid email domains that will be allowed to log in using this connection. Only needed if using the Lock login widget. |
| Disable cache | When enabled, disables caching. |
| Use client SSL certificate authentication | When enabled, uses client SSL certificate authentication. |
| Use Windows Integrated Auth (Kerberos) | When enabled, you will be asked to enter a range of IP addresses. When users log in through these IP addresses, Kerberos will be used; otherwise, AD/LDAP username/password will be requested. Typically, the IP range entered represent intranet addresses. |
| Sync user profile attributes at each login | When enabled, Auth0 automatically syncs user profile data with each user login, thereby ensuring that changes made in the connection source are automatically updated in Auth0. |
 3\. Download the provided installer and make note of the provided **Provisioning Ticket URL**.